I’ve written before about how a simple photo swap can dramatically increase sales. But how do you accomplish that gorgeous product photography? Should you hire a professional, or can you learn to do it yourself? I talked to businesses and photographers to see what tips they shared. If you think I’ve missed any, please leave your advice in the comments!
Strategy matters
First things first. Consider what your product shots should accomplish, and what tone of voice they need to create. Food photographer Sarah E. Crowder writes, “as a photographer, it comes as no surprise that I think high-quality photography is important to your business, but it’s important to get other aspects of your venture in order before investing in photography. For example, you should establish a marketing strategy and go through some sort of branding process before hiring a professional photographer so that you can get the most out of that investment.” Plan the kinds of product photography you need as well as those nice-to-have extra shots that might be leveraged elsewhere. Understand what media channels your product photos will inhabit: e-commerce pages and social media images all the way up to larger-than-life posters or trade show displays.
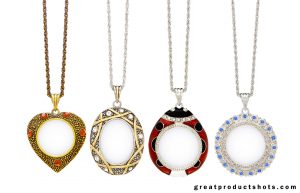
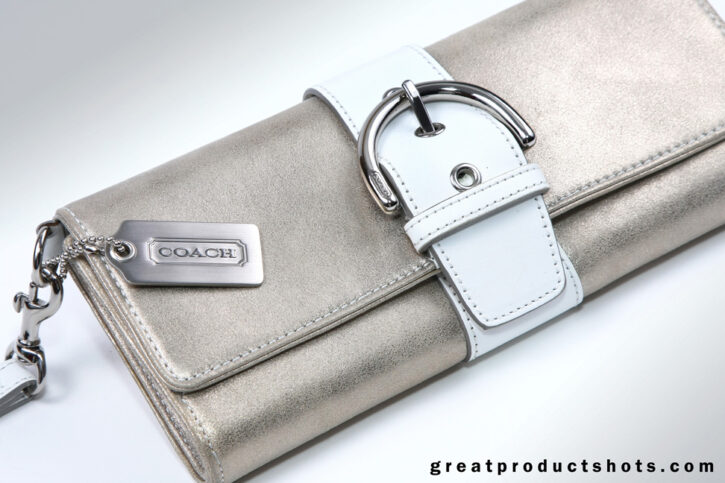
photo: Peter Alessandria / greatproductshots.com
White seamless backgrounds or lifestyle shots?
In all likelihood, you’ll want a combination of pure product photography as well as in-use lifestyle portraits. CJ Johnson, founder of digital agency Januel+Johnson says, “because we live in an era of social media, I typically advise brands to showcase more of what their products look like in use: high-quality lifestyle images, worthy of being featured on Instagram.” In addition, he recommends ongoing studio shoots with generic product shots against simple backgrounds. “If you’re doing both strategies, then you’re getting the most of out of your photos because you can use them for digital ads, your website updates, blogs, promotions, social media, look books, catalogs, and more. If you do both strategies simultaneously then you’re really firing on all cylinders because you’re able to compare the results of doing generic product shots and lifestyle shots.”
DIY or hire?
The answer may come down to a matter of personal preference and marketing objectives. There are product photography studios online where you can ship your products and they’ll shoot and retouch the photos for you. Just a few include Pelican Commerce, Pixel Productions, and Pixc. You can also hire someone locally so that you can be present during the shoot. But even if you end up hiring someone, doing it yourself may help form a basic understanding of product photography that will help you judge the pros. Lisa Chu, owner of children’s clothing company Black N Bianco said, “I started my e-commerce business with a very tight budget and I had to do everything myself. I can say from experience once you understand the basics of photography it will a breeze to take engaging product photos for your e-commerce business.” Even lifelong photographers admit that because cameras have come such a long way, professional-level photos can be had with a minimal investment in camera and lighting. Which brings me to the next tip:
Basic equipment
Camera
Sure, you could use the iPhone in your pocket. But you probably shouldn’t. The lens on your cellphone has a wide angle which distorts the view of your product and can’t compare to a real camera lens in terms of sharpness, clarity, and perspective. Product photographer Peter Alessandria writes, “I bought my 10-year-old niece a refurbished Canon Rebel SL-1 (including lens) from the Canon USA website for less than $300 and I could probably do 80% of my professional work with this camera if I had to.”
Lighting
Crowder recommends, “If you do not have excellent natural light available to you, invest in an inexpensive light kit. I love the Lowel Ego Digital Imaging Fluorescent Light Kit and have a tutorial on how to use it here.” The lights will run you about a hundred dollars. If you want to go even simpler, Alessandria advises, “get some desk lamps at IKEA or work lights at Home Depot if you don’t already have them. Then make sure the White Balance on your camera is set to Auto. The key to good lighting is to use at least two lights and place them to the left and right of your product. Never light the product straight on. Play with different angles to see what looks most interesting. Also be sure to shift the lights or your camera angle to avoid glare if your product has a shiny surface.” He also emphasizes not using the built-in flash on your camera. “Direct flash is the most unflattering light for both people and products.”
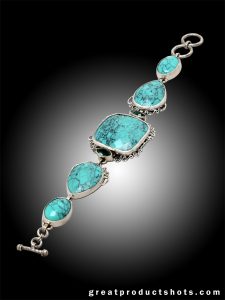
photo: Peter Alessandria / greatproductshots.com
Background and Tripod
Chu believes that “one of the most important aspects to running an e-commerce business is having product photos that convey value and trust in your business. High-quality beautiful product photos can heavily influence your conversion rate.” In order to accomplish this, she says, “it’s best to use a tripod.” For a clean background, “you can purchase a white mat board at your local art store.”
Evolve. Test. Repeat.
Experiment with different featured shots to see if the needle moves on clicks or sales. If you don’t have the time or patience for a live A/B test on your website, use PickFu to poll audiences about what photos they find most attractive. In just a few minutes, you’ll have valuable feedback on what customers are drawn to, and how they react to your product photography.